
The editor
ChatMapper Cloud is a web application. There is nothing to install, nothing to license per machine, and the project you open on a laptop is the same one you open on a desktop an hour later. This page is a tour of the editor, one region at a time.
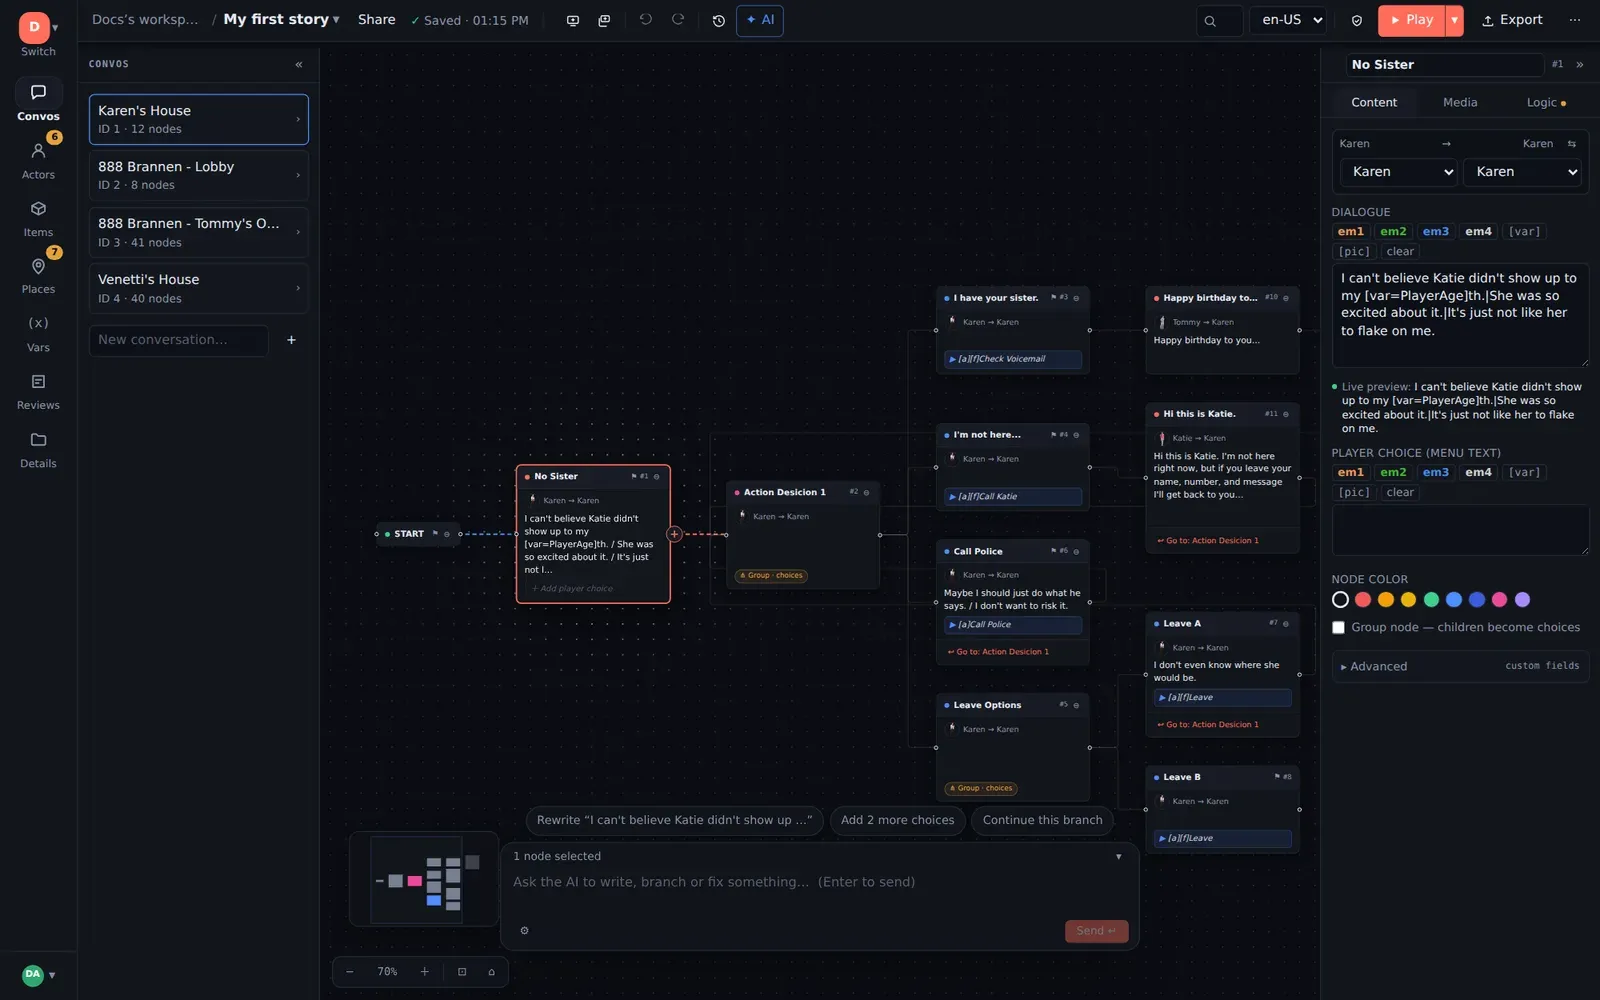
The toolbar (top)
Section titled “The toolbar (top)”Left to right:
| Control | What it does |
|---|---|
| Workspace / project name | Click the workspace to open the workspace panel — projects, members, settings. Click the project name to switch project. |
| Share | Invite reviewers, viewers and editors to this project, and copy a player link. |
| Saved · time | Autosave status. Shows Saving… while a save is in flight. |
| Add node, Add group | New node under the selection (also Tab); a group node whose children become the player’s choices. |
| Undo, Redo | Ctrl+Z / Ctrl+Y. |
| History | The revision history panel. |
| ✦ AI | The AI transcript panel, when AI is enabled for your workspace. The composer itself floats at the bottom of the canvas. |
| Search | Find (Ctrl+F) and find-and-replace (Ctrl+H) across the whole project. |
| Language | Which language the canvas, inspector and simulator display, once the project has more than one. |
| Validate (shield) | Opens the validation panel. The icon carries a count when there are issues. |
| ▶ Play and ▾ | Full-screen play. The menu offers Play from this conversation, Simulate (the author debugger) and Presentation mode. |
| Export | Every export format, grouped by what you would do with it. |
| ⋯ | Layout and display options — direction, flow animation, node colours, node IDs, collapse/expand, structured layout. |
The rail and panel (left)
Section titled “The rail and panel (left)”The narrow rail is the project’s table of contents. Each tile opens a panel beside it:
- Convos — the conversations in the project. Click one to put it on the canvas; New conversation… adds another. The count of nodes is shown under each.
- Actors — the characters. Each has a name, a description, a portrait and an Is player flag; the badge on the tile is how many there are.
- Items and Places — the other two asset lists. Items double as quests in some engines; Places can carry a scene picture that Play mode shows behind the dialogue.
- Vars — the variables your conditions test and your scripts set. Each has a name, an initial value and a description.
- Reviews — every reviewer note in the project, filtered by open / resolved.
- Details — project title, author, description, the project-level Lua script, localisation languages, dialogue emphasis styles and custom field templates.
The « at the top of the panel collapses it to give the canvas more room.
The canvas (middle)
Section titled “The canvas (middle)”The graph. Each card is a node showing its title, speaker → listener, dialogue and — when it is a choice — the menu text in a button. Under the card, + Add player choice adds a child in one click; the + on the right-hand edge is the drag handle for linking.
- Drag the background to pan, scroll to zoom, or use the − / % / + controls bottom-left. The two buttons beside them fit the view and jump to START.
- The minimap in the corner shows the whole conversation; click it to jump.
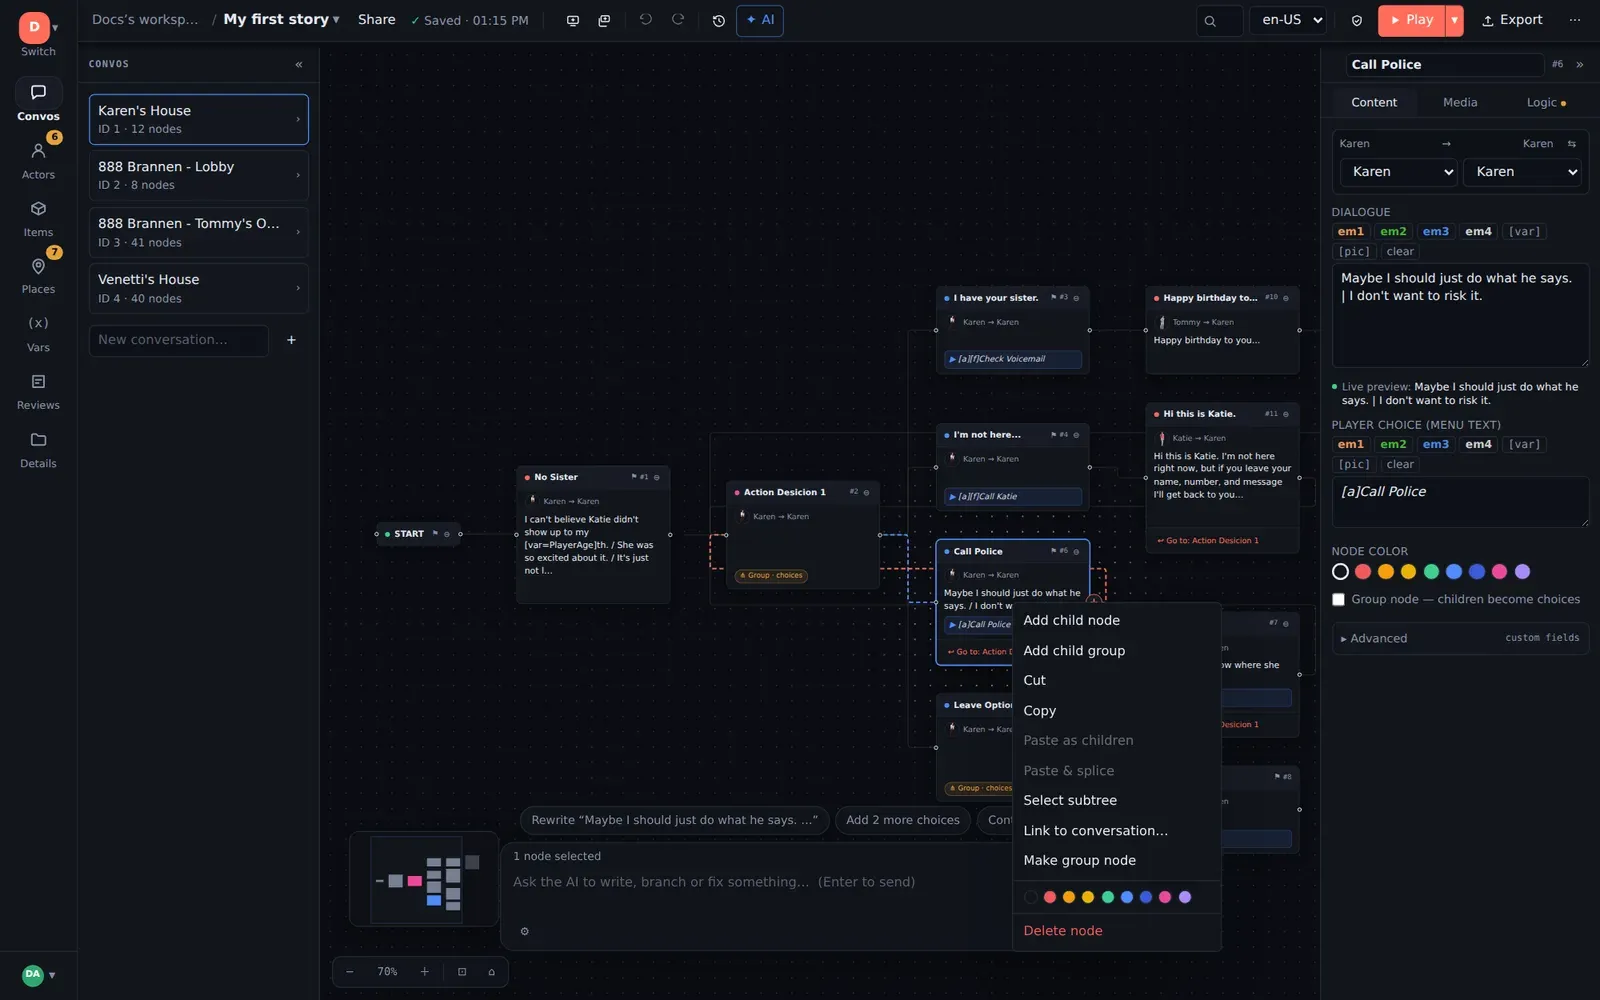
- Right-click a node for its context menu: add child node or group, cut, copy, paste as children, paste & splice, select subtree, link to another conversation, make group node, colour, delete.
The inspector (right)
Section titled “The inspector (right)”Everything about the selected node, in three tabs:
- Content — title, actor and conversant (with a swap button), dialogue,
player choice text, node colour, the group node flag, and Advanced
custom fields. The emphasis buttons (
em1–em4,[var],[pic]) insert inline markup at the cursor, and a live preview shows how the line renders. - Media — audio, video, animation and picture slots, with upload, URL attach, preview and playback. See Media.
- Logic — the condition, what to do if it is false, priority, the node’s Lua script, links to other conversations, and reviewer notes. See Logic and variables.
The » collapses the inspector. Select several nodes and the inspector offers bulk actions: set a field, actor, conversant or review status on all of them at once.
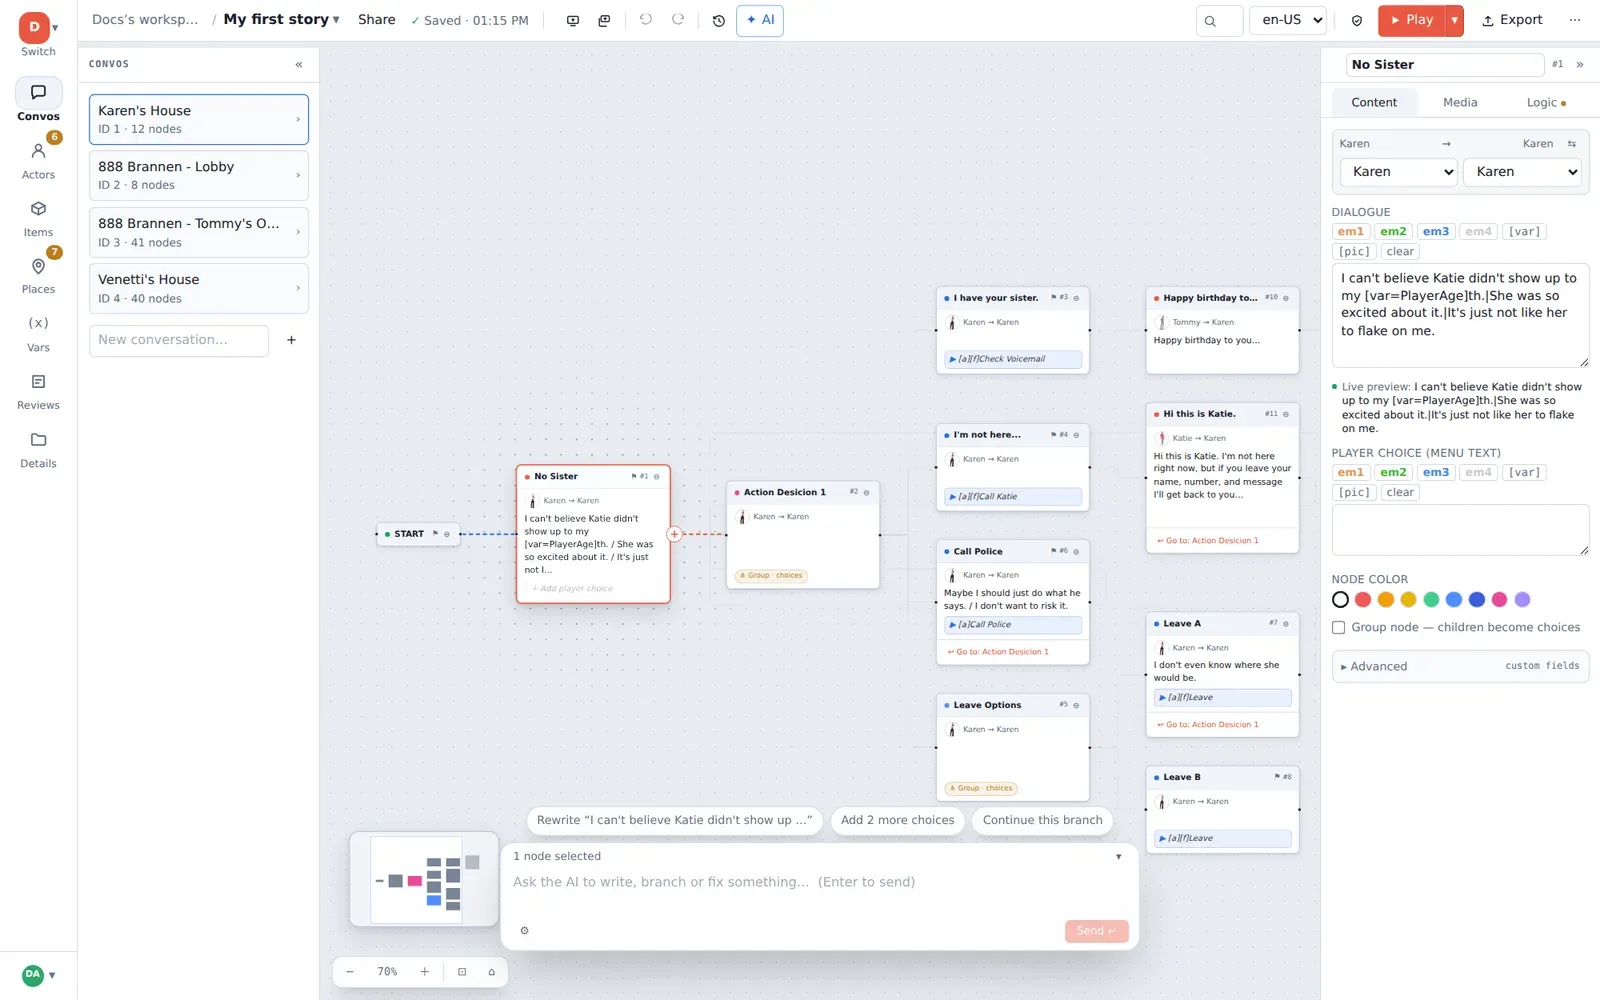
Dark and light themes
Section titled “Dark and light themes”Click your avatar in the bottom-left corner and choose Light mode or Dark mode. The choice is remembered per browser.
Working on a small screen
Section titled “Working on a small screen”The layout adapts. On a narrow window the rail and its panel become one full-screen sheet, and toolbar buttons that no longer fit move into the ⋯ menu. On a phone, the player link from the Share dialog opens the story full-screen with no editor chrome at all — the right way to read a draft on the train.
Keyboard navigation
Section titled “Keyboard navigation”You can build an entire tree without touching the mouse:
| Key | Action |
|---|---|
| Tab | New child of the selected node |
| Enter | New sibling |
| Arrow keys | Move between nodes |
| Home | Jump to START |
| Ctrl+↑ / ↓ | Reorder among siblings — this is the order choices appear in |
| Double-click a node’s text | Edit in place; Enter commits, Esc cancels |
| Delete | Delete the selected node(s) or link |
The full list, including clipboard, zoom and search, is on Keyboard shortcuts.
Presentation mode
Section titled “Presentation mode”Play ▾ → Presentation mode hides the editor chrome and leaves only the canvas — for demos, screenshots and pitch meetings. Esc returns.